


Gynaecomastia Before and After: Interpreting Realistic Surgical Outcomes
Understanding gynaecomastia before and after photos is crucial for setting realistic surgical expectations. This guide details how to critically evaluate patient galleries, focusing on consistent lighting and angles to discern authentic surgical results. Learn to identify manipulated images and match your body type to relevant examples for a clearer understanding of potential chest contour improvements. Accurate photo analysis helps patients form realistic expectations regarding aesthetic outcome and scar visibility, ensuring a more informed journey towards male breast reduction.
Mr. Khurram Khan, a UK-trained Consultant Plastic Surgeon, provides expert guidance on interpreting these images. His practice prioritizes natural, balanced outcomes, emphasizing transparency and patient education in gynaecomastia correction.
To explore your options, contact us to schedule your consultation. You can also reach us via: Book your gynaecomastia consultation
Decoding Gynaecomastia Before & After Photos: What to Look For
Photo analysis requires scrutinising presentation consistency. Ethical patient galleries use standardised photography for a fair and accurate comparison of the surgical outcome. Look for images where the lighting, background, patient pose, and camera distance are identical in both ‘before’ and ‘after’ shots. These controls eliminate variables that could distort the appearance of the results.
Reviewing a surgeon’s gallery assesses their commitment to transparency, not just the final chest contour. A gallery with strict photographic standards signals clear communication and helps form realistic expectations for your potential outcome.
The Foundation of Fair Comparison: Consistency is Key
For a true comparison, all photographic elements must be controlled. Lighting and angles can honestly document a change or create a misleading illusion. Harsh overhead lighting can create shadows that accentuate muscle definition, while soft, diffuse lighting can smooth over minor irregularities. A slight turn of the torso or a change in posture—such as pulling the shoulders back in the ‘after’ photo—can dramatically alter the chest’s appearance. A professional gallery features multiple, consistent views (front, side, oblique) for a comprehensive understanding of the three-dimensional changes.
Beyond the Surface: How to Spot Authentic vs. Misleading Surgical Results
Distinguishing between genuine documentation and staged images is a critical skill for any prospective patient. Authentic galleries present unedited photos showing the real aesthetic outcome, including skin texture and mature scars. Misleading galleries may use manipulation to create a flawless impression unrepresentative of a typical patient’s journey.
Pay close attention to details like skin tone, the presence of moles or blemishes (which should be consistent between photos), and image sharpness. Overly smooth skin can be a sign of digital airbrushing. Being an informed observer protects you from developing unrealistic expectations based on manipulated imagery.
Navigating the Visual Landscape: Red Flags and Green Lights
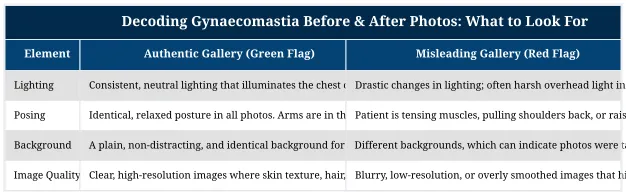
This table outlines key differences between trustworthy and questionable photo galleries, helping you assess the quality of the surgical results presented.
View data as table
| Element | Authentic Gallery (Green Flag) | Misleading Gallery (Red Flag) |
|---|---|---|
| Lighting | Consistent, neutral lighting that illuminates the chest clearly without creating dramatic shadows. | Drastic changes in lighting; often harsh overhead light in ‘after’ shots to create definition. |
| Posing | Identical, relaxed posture in all photos. Arms are in the same position (e.g., at the sides). | Patient is tensing muscles, pulling shoulders back, or raising arms in the ‘after’ photo. |
| Background | A plain, non-distracting, and identical background for both before and after images. | Different backgrounds, which can indicate photos were taken in different conditions or at different times. |
| Image Quality | Clear, high-resolution images where skin texture, hair, and small marks are visible. | Blurry, low-resolution, or overly smoothed images that hide fine details and potential imperfections. |
Matching Your Body Type: Finding Relevant Gynaecomastia Patient Galleries
The most valuable insights come from a patient gallery that includes individuals with a similar starting anatomy to your own. A surgeon’s skill is demonstrated across a variety of cases, from minor glandular tissue removal to more significant reductions involving skin tightening. The final aesthetic outcome is influenced by pre-existing factors such as body mass index (BMI), skin elasticity, and the underlying pectoral muscle shape.
Focusing on cases that mirror your own provides a clearer picture of what is surgically possible. For example, the approach for an athletic individual with dense glandular tissue will differ from that for a patient who has experienced significant weight loss and has looser skin. A diverse gallery reflects a surgeon’s experience in tailoring their technique to individual patient needs for effective gynaecomastia correction.
Why Your Unique Anatomy Matters in Photo Selection
Your body’s characteristics significantly affect the final chest contour. When reviewing photos, consider how the surgeon has managed different anatomical challenges. This body type matching helps you set more accurate and personal goals for your surgery.
View data as table
| Anatomical Factor | What to Look For in Photos | Why It Matters for Your Outcome |
|---|---|---|
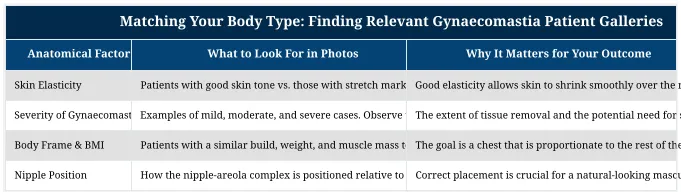
| Skin Elasticity | Patients with good skin tone vs. those with stretch marks or loose skin. Note how the skin has retracted post-surgery. | Good elasticity allows skin to shrink smoothly over the new chest contour. Poor elasticity may require skin excision techniques. |
| Severity of Gynaecomastia | Examples of mild, moderate, and severe cases. Observe the incision techniques used for each. | The extent of tissue removal and the potential need for skin tightening will determine the surgical plan and scar placement. |
| Body Frame & BMI | Patients with a similar build, weight, and muscle mass to your own. | The goal is a chest that is proportionate to the rest of the body. Results on a lean frame will look different from those on a larger frame. |
| Nipple Position | How the nipple-areola complex is positioned relative to the pectoral muscle in the ‘after’ photos. | Correct placement is crucial for a natural-looking masculine chest. In some cases, the nipple may need to be repositioned. |
Understanding Scarring and Long-Term Gynaecomastia Results
All surgery results in scarring. In gynaecomastia surgery, incisions are placed to be as inconspicuous as possible, often around the areola border (periareolar incision) or, in cases requiring skin removal, within the chest fold. A scar’s initial appearance is not its final state. A patient gallery should include photos taken at various stages of healing, ideally 6-12 months post-operation, to show how scars mature over time.
Long-term results also depend on maintaining a stable weight, as significant weight fluctuations can alter the chest contour. The removed glandular tissue does not typically grow back, making the surgery’s results long-lasting. Understanding scar visibility and the evolution of the final shape is key to forming realistic expectations.
The Journey of Healing: From Incision to Mature Scar
After surgery, incisions will be visible and may appear red and slightly raised. Over the following months, the scar will gradually fade, soften, and flatten. According to guidance from the National Health Service (NHS), most scars fade significantly over a period of up to 18 months. A surgeon’s technique, individual healing factors, skin type, and adherence to post-operative care instructions are all vital for the final scar quality.
Why Mr. Khan’s Philosophy Shapes Natural Gynaecomastia Outcomes
The surgical results in a gallery reflect the surgeon’s aesthetic philosophy. Mr. Khurram Khan, a UK-trained Consultant Plastic, Reconstructive and Aesthetic Surgeon, approaches male chest contouring to achieve natural, balanced, and well-proportioned outcomes. His background in complex reconstructive surgery, including an NHS consultant post, informs his approach to aesthetic procedures.
This philosophy translates into results that do not look ‘operated on’. The aim is a masculine chest contour in harmony with the patient’s physique. This involves removing excess tissue and sculpting the remaining fat and tissue to blend with the chest wall and pectoral muscles. This attention to detail is a hallmark of a consultant plastic surgeon for gynaecomastia who combines technical skill with an artistic eye.
The Art of Balance: A Consultant’s Approach to Male Chest Contouring
A consultant-led approach ensures a specialist oversees every stage, from initial assessment to post-operative care. Mr. Khan’s training on the GMC Specialist Register for Plastic Surgery and his membership in organisations like the British Association of Plastic, Reconstructive and Aesthetic Surgeons (BAPRAS) underscore a commitment to the highest standards of patient safety and care. The aesthetic outcome is planned with a deep understanding of anatomy, ensuring the final chest contour is aesthetically pleasing, functionally sound, and respects the body’s natural lines.
Setting Realistic Expectations for Your Gynaecomastia Journey
Using before and after photos effectively builds a foundation for realistic expectations. These images are a tool, not a guarantee of your specific result. They represent what is possible and showcase a surgeon’s typical work. The crucial step is to integrate these visual insights into a personal consultation with your surgeon.
During your consultation, you can discuss specific photos that appeal to you and ask how those results might relate to your own anatomy. This dialogue allows the surgeon to explain your case’s nuances, including your skin quality, chest tissue composition, and the surgical plan required to meet your goals. Combining visual research with expert medical advice aligns your hopes with an achievable surgical outcome.
Bridging the Gap: Photos, Consultation, and Personal Goals
A gallery of gynaecomastia before and after images serves as a bridge between your initial research and your final decision. It helps you formulate specific questions for your surgeon and provides a common visual language to discuss your desired aesthetic. A successful outcome meets the realistic expectations established before the procedure. You can review examples of patient journeys and read testimonials to better understand this process.
Ready to Explore Your Options? Book a Consultation
Interpreting a gynaecomastia before and after gallery is the first step toward an informed decision. The next is a consultation to discuss your personal anatomy, aesthetic goals, and any questions. A personal assessment is essential to develop a surgical plan tailored to you.
If you are considering male breast reduction surgery, schedule a private consultation with Mr. Khurram Khan to understand what results may be achievable for you.
Conclusion
Critically analyse pre- and post-operative images beyond a superficial glance. Focusing on consistency, comparable body types, and the realities of scarring and healing helps set achievable goals. These galleries demonstrate a surgeon’s aesthetic principles and technical consistency, not promise an identical result. Your next step is a conversation with a qualified consultant surgeon to create a personalised surgical plan. To begin, please contact us or Book your gynaecomastia consultation.
Frequently Asked Questions
How can I spot misleading edits in male breast reduction photos?
Look for inconsistencies in lighting, background details, and the patient’s posture or muscle tension between the ‘before’ and ‘after’ shots. Ethical surgical galleries, as guided by standards from bodies like the British Association of Aesthetic Plastic Surgeons (BAAPS), use standardised photography to provide a true and fair comparison of the surgical outcome.
Why is it crucial to find photos of patients with a similar body type to mine?
Focusing on patients with a similar starting chest size, body mass index (BMI), and skin quality gives you the most realistic preview of your potential results. A successful outcome on a lean patient may look different from one on a patient with more body fat, so this direct comparison is essential for setting accurate expectations.
What specific details indicate a good surgical result in gynaecomastia before and after photos?
A high-quality result shows a smooth, masculine chest contour without unnatural depressions or residual puffiness. The nipple-areola complex should be well-centred on the pectoral muscle, appropriately sized, and lie flat. In high-resolution gynaecomastia before and after images, you should also see that any scars are fine, well-placed, and maturing cleanly.
How can I properly evaluate scarring in these patient galleries?
Look for galleries that show results at various post-operative stages, such as 3 months and over a year, to see how scars mature and fade. Note the placement of incisions, which for gynaecomastia are often periareolar (around the edge of the areola), and assess if they are neat and discreet in the final ‘after’ images.
Do before and after photos show the difference between glandular tissue removal and liposuction?
While photos show the final contour, they do not explicitly detail the technique used. However, cases with significant, firm glandular tissue (true gynaecomastia) often require direct excision, whereas softer, fatty chests (pseudogynaecomastia) may be addressed with liposuction. A surgeon’s gallery showing consistent results across varied chest types demonstrates their expertise in applying the correct technique for each patient’s specific anatomy.


